


How to Hide Smile Lines With Makeup Using the Right Techniques
How to Hide Smile Lines With Makeup Using the Right Techniques
Smile lines are one of the most active areas of the face. For good reason, too. They've been there for countless conversations, laughs, smiles, and coffee dates over the years. It's no surprise that makeup can have a harder time staying perfectly smooth there than it does in other areas of the face.
For many women, the frustration isn't the smile lines themselves. It's watching makeup settle into them a few hours after application. What starts out looking smooth can gradually collect in those natural folds, making them appear more noticeable than they really are.
As skin changes over time, this can become even more noticeable. A little less natural moisture, a little more texture, and formulas that once worked perfectly may not wear quite the same way they used to.
You don't need to stop smiling, and you don't need a complicated makeup routine, either.
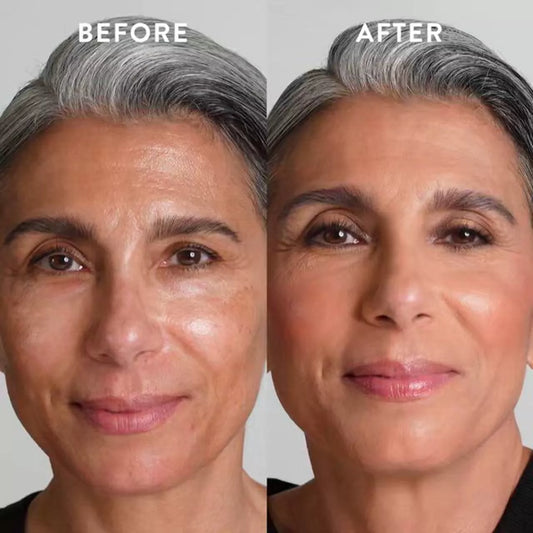
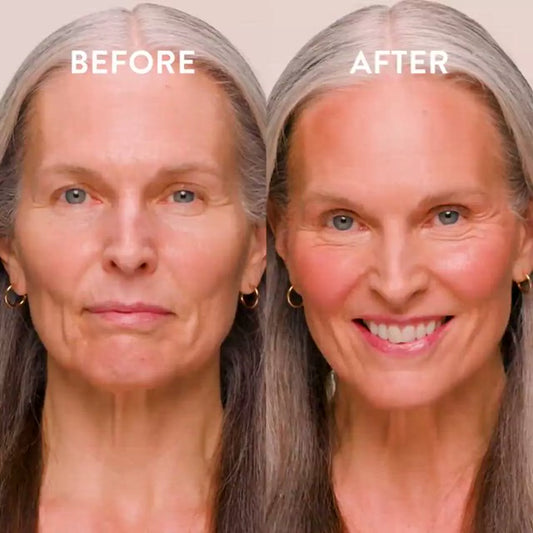
While no makeup can completely erase smile lines, the right techniques can help soften their appearance and keep foundation looking smoother throughout the day. In this guide, we'll walk through exactly how to hide smile lines with makeup and how to stop makeup from creasing in smile lines in the first place.
Shop makeup made for mature skin.
Why Makeup Creases in Smile Lines, Especially on Mature Skin
The mouth moves more than almost any other part of your face, and as skin changes over time it has a little less moisture and a little more texture to contend with. Put those two things together and you have an area that needs a slightly different approach than the rest of your face.
None of that is permanent, and none of it is your skin's fault. It's mostly a technique and formula question, and both are easier to adjust than you'd think.
How to Hide Smile Lines With Makeup: A Step-by-Step Technique Guide
Getting makeup to sit smoothly around smile lines isn't about covering more. It's about building a routine that works with that part of your face instead of fighting it.
Step 1: Start With Hydrated, Balanced Skin
Before any makeup touches your face, the skin around your mouth needs moisture. This sounds simple, but it's where most smile line creasing actually starts.
Dry skin around the mouth acts almost like a magnet for product. Foundation and concealer settle into whatever texture is there, and if the skin is parched, that happens fast. Getting some moisture into that area before makeup goes on is what creates a smooth base that keeps everything in place longer.
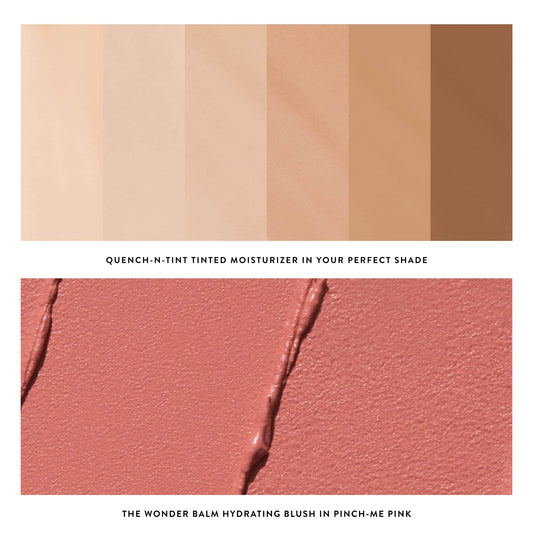
Our Spackle Skin Perfecting Primer in Hydrate is a great option here because it's hydrating enough to pull double duty as a moisturizer and primer in one step. Press a small amount into the skin around your mouth and give it a moment to absorb before moving on.
Step 2: Use a Line Smoothing Primer Only Where You Need It
If smile lines are a real concern, a targeted line filler applied before foundation is one of the most effective steps you can add to your routine. The key word is targeted: you only need a small amount right in the lines themselves, not all over.
Our Line Smoother Targeted Fine Line Filler is designed exactly for this. It fills in the appearance of fine lines so foundation sits on top of smoother-looking skin rather than settling into texture. Apply a small amount with your fingertip, press it in gently, and let it set for a moment before foundation goes on.
Use the tip of your ring finger to press a small amount along the smile lines and blend outward. You're filling in texture, not building a layer.
Step 3: Choose a Lightweight, Buildable Foundation Formula
The type of foundation you use makes more of a difference around smile lines than anywhere else on your face. Heavy, full-coverage liquids have more material to collect in folds, which is why they're often the first thing worth reconsidering if creasing is a consistent issue for you.
Baked and lightweight buildable formulas wear very differently. They flex with the face more naturally, and because they're less dense, there's simply less product to settle into texture.
Our Double Take Baked Full Coverage Foundation is worth knowing about here. The baked format gives you the coverage you're after without the heavy liquid formula that tends to crease, and it builds beautifully if you want more coverage in specific areas. For more options across different finishes and coverage levels, our guide to the best foundations for mature skin walks through several formulas worth considering.
Step 4: Apply Less Product Where the Face Moves Most
This is the technique shift that tends to make the biggest difference, and it runs counter to what most of us instinctively do.
When we see an area we want to cover, we add more product. But around the mouth, more product is usually what creates the problem. The technique that works: apply foundation everywhere else first, then use only what's left on your brush or sponge around the smile lines. You're depositing the last of the product rather than a fresh amount, which means a lighter application naturally.
Blend outward from the smile line rather than into it, and use a patting motion rather than strokes. The idea is to place product on the surface of the skin rather than pushing it into texture.
Step 5: Skip Heavy Concealer Directly in Smile Lines
Concealer is thicker than most foundations, which means it settles more readily. Applying a heavy concealer directly over smile lines usually makes them more visible over the course of the day, not less.
If you need a little extra coverage in that area, rely on your foundation and build it there with a second light press of your sponge. Reserve concealer for areas that don't move as much, like under the eyes or on the sides of the nose.
Step 6: Use Pressing Motions Instead of Swiping
How you apply product matters as much as how much you use. Swiping and dragging pulls product across the skin and pushes it directly into lines. Pressing and stippling keeps it on the surface, right where you want it.
This applies to every step, from blending primer to applying foundation to setting powder. If you've been using a beauty sponge with a pressing motion for under-eye coverage and noticed it works better than a brush, you already understand the principle. Apply the same approach to the smile line area and you'll notice a difference quickly.
Step 7: Lightly Set With a Finely Milled Powder, Only If Needed
Setting powder around the smile lines should be optional, not automatic. For some skin types and some formulas, a light set helps everything stay in place. For drier skin, too much powder can actually make creasing worse by adding another layer for product to collect in.
If you do set this area, use a small fluffy brush and the lightest possible dusting. Our Baked Blurring + Setting Powder is finely milled and baked rather than pressed, which means it smooths and blurs without adding the weight that regular setting powders can. Tap your brush into the powder, tap off any excess, and press gently rather than sweeping.
How to Stop Makeup Creasing in Smile Lines Throughout the Day
Getting a smooth application is one part of the equation. Keeping it that way is another.
What to Do Immediately After Application
Nobody is suggesting you sit completely still and stare at the wall after doing your makeup. But if you can give your foundation two or three minutes before jumping on a phone call or heading straight out the door, it makes a real difference. Foundation bonds to skin during those first few minutes, and a little breathing room before the face starts moving means it has something to hold onto.
How to Blot and Smooth Without Adding More Makeup
When creasing starts to show mid-afternoon, the natural response is to reach for your foundation and touch it up. Try to resist that. Layering more product on top of makeup that's already settled usually just adds to the problem.
What actually works is much simpler: press along the smile lines gently with a clean ring finger. The warmth softens whatever has shifted and blends it back into the skin, and it takes about ten seconds. If you want a more complete refresh, blot first with a tissue, then mist lightly with our Spackle Mist Boost with Electrolytes and press. No new product needed.
When to Refresh Glow and When to Leave Skin Alone
Here's permission to put the makeup bag down: not every crease that shows up by 4pm needs fixing. Your makeup has been through a full day with you, and a little settling is just part of that. If everything looks generally good and you feel comfortable, that's the goal. Chasing absolute perfection at the end of the day usually just means adding more product, which, as we've covered, usually doesn't help.
Common Smile Line Makeup Mistakes That Make Creasing Worse
A few things worth double-checking, especially if you've tried adjusting your routine and creasing is still a concern.
Touching up with the same product that already creased. If your foundation has settled by mid-afternoon, adding more of it on top usually doesn't help. The ring finger trick or a light mist will get you further than a fresh layer of product.
Treating smile lines like the rest of your face. Heavy setting, generous concealer, full foundation coverage: all things that work elsewhere and tend to backfire here. This area just needs a lighter approach across the board.
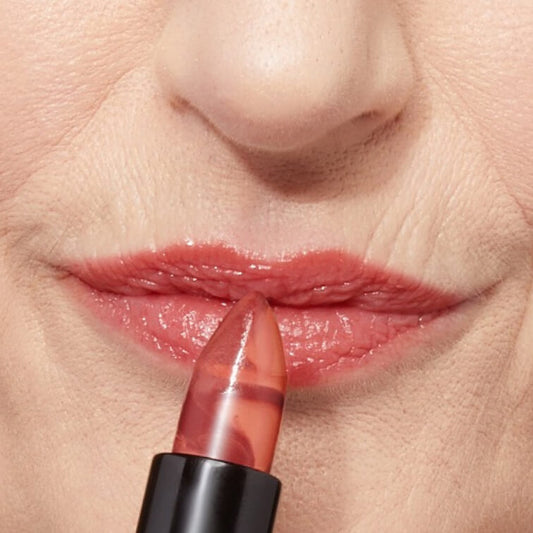
Forgetting about your lips. Lipstick and lip liner that feather into the lines around your mouth is its own version of this problem. If that's something you're dealing with, our guide to lipstick feathering is a helpful next read.
For a broader look at what works for mature skin, our easy makeup tips for older women covers a lot of ground.
A Smoother Finish Starts With Smarter Choices
Good prep, a lighter hand, and formulas that are actually designed for mature skin can make a noticeable difference in how makeup wears throughout the day. None of it requires starting your routine from scratch, just a few small adjustments that add up.
The goal was never to erase smile lines. It was just to stop your makeup from making them more noticeable than they need to be. Adjust a few things, find the formulas that actually suit your skin, and then get on with your day. Life is far too short to spend it trying not to laugh.